目录
【实验目标】
【实验内容】
【代码要求】
【文档要求】
【实验目标】
- 理解前向传播和反向传播
- 应用作业一中提到的基本操作
【实验内容】
假设X有n个样本,属于m=3个类别,  表示样本属于第m类的概率,请实现
 的三次前向传播及反向传播(更新参数ω和b),每次反向传播结束后更新并输出参数ω和b的值,计算cross entropy loss,其中σ(∙)表示sigmoid函数。
【代码要求】
按代码模板实现函数功能
【文档要求】
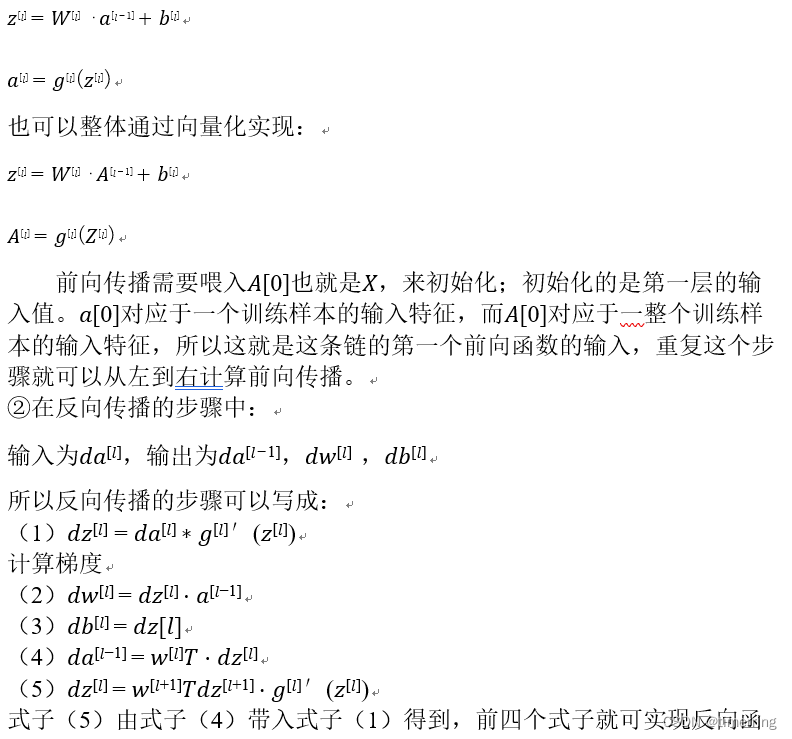
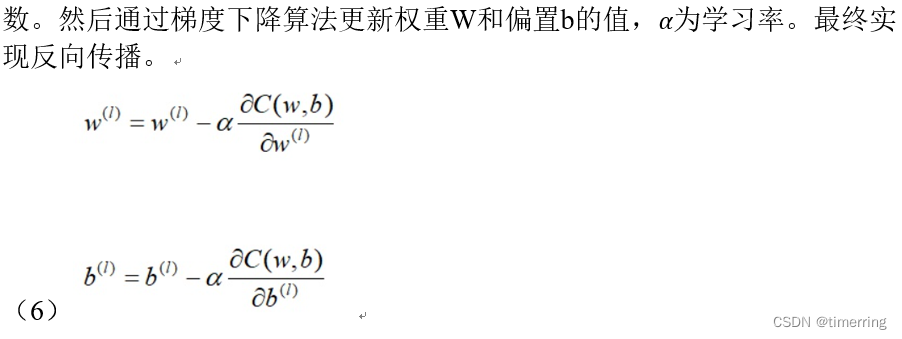
前向传播及反向传播涉及到的公式计算(参考)
①在前向传播的过程中,可以如下表示


粘贴代码输出结果截图。
- import os
- import numpy as np
- import math
-
-
- def sigmoid(x):
- """
- Compute the sigmoid of x
-
- Arguments:
- x -- A scalar or numpy array of any size
-
- Return:
- s -- sigmoid(x)
- """
- # write your code here
- sig = 1 / (1 + np.exp(-x))
- return sig
-
-
- def softmax(x):
- """Calculates the softmax for the input x.
-
- Argument:
- x -- A numpy matrix of shape (n,)
-
- Returns:
- s -- A numpy matrix equal to the softmax of x, of shape (n,)
- """
- # write your code here
- return x
-
-
- def cross_entropy_loss(target, prediction):
- """
- Compute the cross entropy loss between target and prediction
-
- Arguments:
- target -- the real label, a scalar or numpy array size = (n,)
- prediction -- the output of model, a scalar or numpy array, size=(n, c)
-
- Return:
- mean loss -- cross_entropy_loss(target, prediction)
- """
- # write your code here
- delta = 1e-6
- return -np.sum(prediction * np.log(target + delta))
-
-
- def forward(w, b, x):
- """
- Arguments:
- w -- weights, a numpy array of size (m, 1)
- b -- bias, a scalar
- x -- data of size (n, m)
-
- Return:
- prediction
- """
- ## write your code here
- prediction = sigmoid(x @ w + b)
- # print(prediction.shape)
- return prediction
-
-
- def backward(x, target, prediction):
- """
- Arguments:
- x -- data of size (n, m)
- target -- data of size (n, num_class)
- prediction -- data of size (n, num_class)
-
- Return:
- dw, db
- """
- delta = target - prediction
- db = delta
- dw = sigmoid(x.T) @ delta
- return dw, db
-
-
- # don't edit
- if __name__ == '__main__':
- ## three samples
- x = np.array([[12, 3, 7, 4], [3, 10, 4, 9], [9, 6, 2, 0]])
- target = np.array([0, 1, 2])
- num_class = 3
- ## learning rate of the gradient descent update rule
- learning_rate = 0.001
- ## one-hot label
- target = np.eye(num_class)[target]
- n, m = x.shape
- w = np.zeros([m, num_class])
- b = 0
- # three iterations of forward and backward
- for i in range(3):
- prediction = forward(w, b, x)
- loss = cross_entropy_loss(target, softmax(prediction))
- dw, db = backward(x, target, prediction)
- # update w and b
- w = w - learning_rate * dw
- b = b - learning_rate * db
- print("iter = {}, w = {}, b = {}, loss= {}".format(i, w, b, loss))
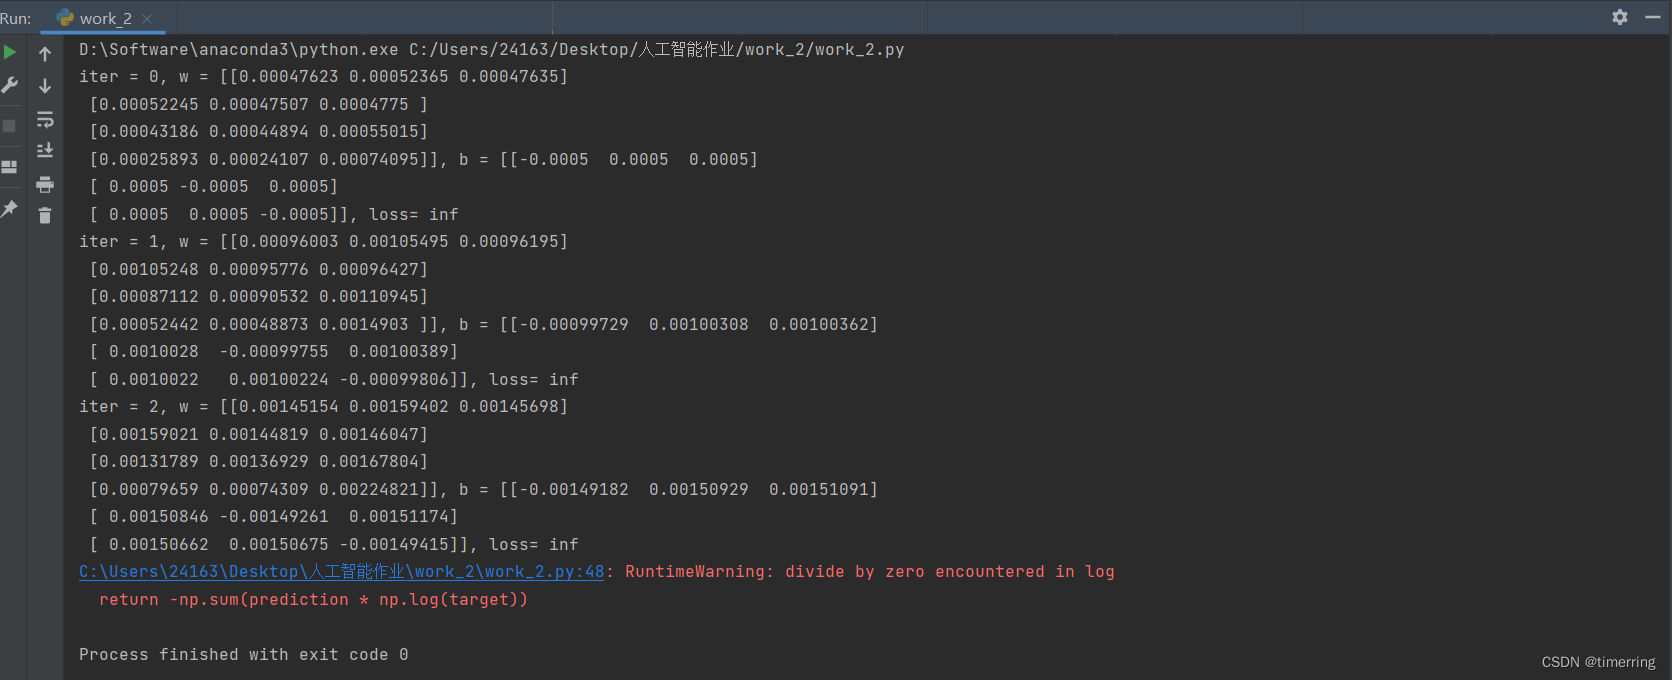
初次的实验结果如下:

可见按照定义写出函数时结果并不理想,因为在main代码中设置的参数权重都设置为0了,导致log以后数值无穷,导致内存溢出,且一般这样做的效果并不好,在Andrew Ng的DL课程中有对应的解释。
把权重或者参数都初始化为0,那么梯度下降将不会起作用。把权重都初始化为0,那么由于隐含单元开始计算同一个函数,所有的隐含单元就会对输出单元有同样的影响。一次迭代后同样的表达式结果仍然是相同的,即隐含单元仍是对称的。这个问题的解决方法就是随机初始化参数。把𝑊设为np.random.randn(m, num_class) (生成高斯分布),通常再乘上一个小的数,比如0.01,这样把它初始化为很小的随机数,只要随机初始化𝑊你就有不同的隐含单元计算不同的东西,因此不会有symmetry breaking 问题了。
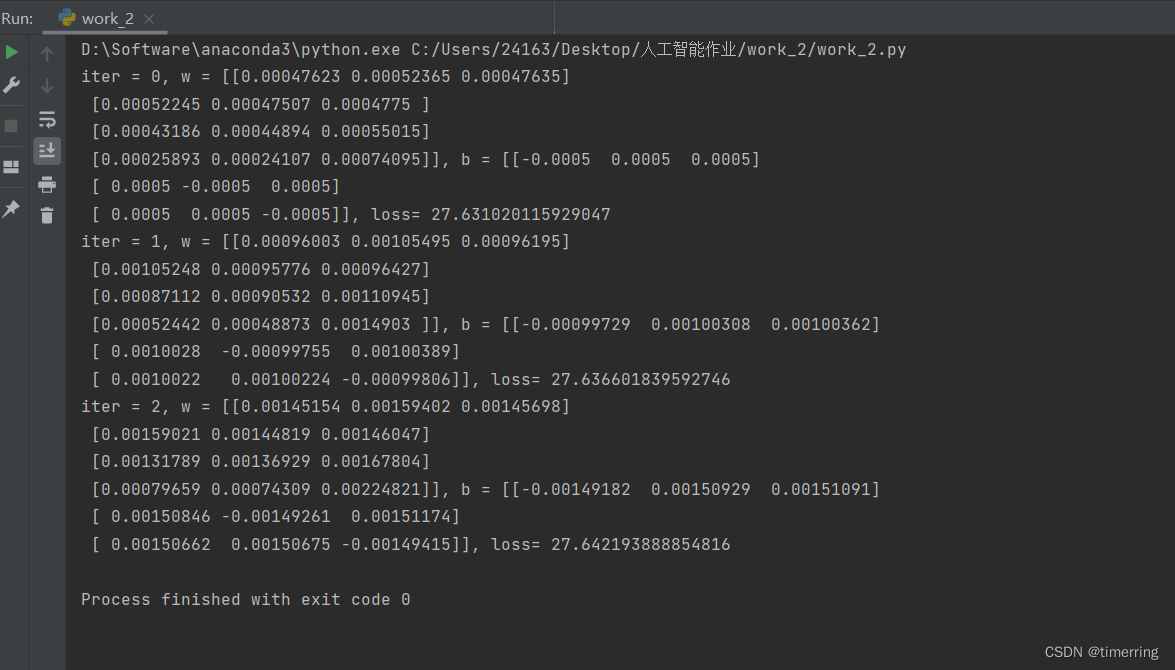
由于不能修改main中的初始化代码,因此我在网上查找了对应的解决方法,发现可以通过对数据精度的处理解决这个问题,这里我通过添加delta量,改变了浮点数的精度为1e-6,计算效果良好。如下所示:

初学人工智能导论,可能存在错误之处,还请各位不吝赐教。
受于文本原因,本文相关实验工程无法展示出来,现已将资源上传,可自行下载。
山东大学人工智能导论实验2工程文件-前向传播和反向传播-深度学习文档类资源-CSDN下载山东大学人工智能导论实验2工程文件-前向传播和反向传播详解博客地址:https://blog.cs更多下载资源、学习资料请访问CSDN下载频道.https://download.csdn.net/download/m0_52316372/85912862
 微信公众号
微信公众号
